
ystem Essentials
Software

XCVario S/N: 1234
The unique variometer ID, used for Bluetooth ID and WiFi Id of this Device e.g.: “XCVario-1234”
Rev: 2.0.4-0-ga2494fcd
The installed software version. It is a plain github version string format. In this example major-, minor-, fix- revision and additionally the hash from the source control system.
Internet Access
Access Point
[Cancel]
[Select AP]
Select the AP for software update. This is not yet fully supported and will come asap.
[Check for the Update]
Update

[Cancel]
[Start Webserver]
Check for the Update
The feature is under development, and required an access point to be configured in the previous step. As soon as it is operational, it will be described here.
Start Webserver
This is the classic software update method provided by XCVario. The device software is available as open source on the project’s GitHub page. For downloading the firmware file and performing the update, Mozilla Firefox is recommended. Other browsers may also work; however, some browsers or operating systems may incorrectly handle the binary file extension, which can lead to download or installation issues.
Official software releases are published at: https://github.com/hjr/XCVarioPure/releases
Firmware updates can be installed via the built-in WiFi access point of the variometer. A smartphone, tablet, or laptop can be used for this purpose. Before connecting to the XCVario WiFi network:
- Download the desired firmware file (for example,
xcvario_pur-2.0.4.bin) using an internet connection. - Save the file locally on the device that will be used for the update.
- Verify that the downloaded file size matches the value shown on the release page.
Once the file has been downloaded and verified, connect to the XCVario WiFi network and perform the OTA update through the web interface.
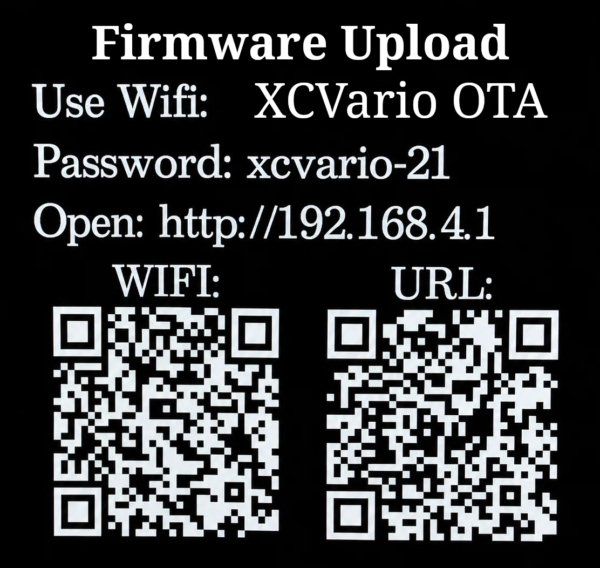
Selecting [Webserver] the device will reboot and fall into the following screen to connect with your mobile device and upload the previously downloaded file.
Connect your device to the WiFi network “XCVario OTA” provided by the variometer. It uses WPA2-PSK security; the password is displayed on the variometer, here you see “xcvario-21”.
After connecting, open a web browser and navigate to http://192.168.4.1. Ensure that the browser uses the http prefix, not https, and disable any automatic redirection if necessary. Use the browser interface to select the firmware file and upload it. The update dialog shows progress information and confirms success both in the browser and on the variometer display.
Very First Pur Start
The very first boot of the Pur Variometer is guiding through all factory calibration and test steps. In case you upgrade from a previous XCVario firmware one additional calibration step left to do and prevents you to be able to leave the factory jail.
To properly do the IMU bias calibration it is necessary to remove the variometer from the instrument panel. Prepare a smal leveled mount to position the variometer in all 6 orthogonal orientations.
IMU BIases: Acc Calib.
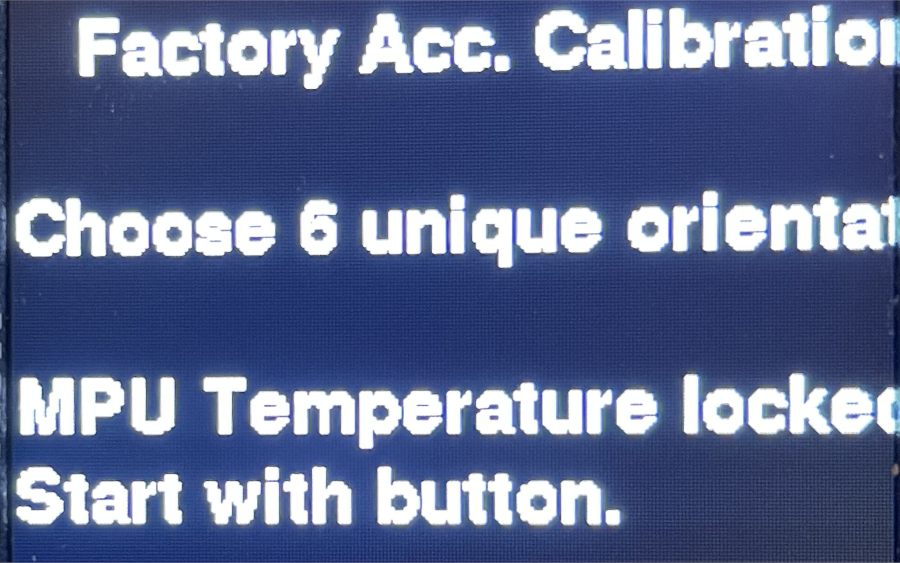
Choose this setup to calibrate the accelerometer biases in all six orthogonal orientations. Wait for the IMU sensor to reach the proper temperature. Then start with a button press. The following procedure does no further needs button presses, rather than the IMU sensor triggers when the variometer comes to a stand still (rest). Then it takes a couple measurement samples and plays a chimes sound to let you know to go on to the next orientation.
The measurements will be checked roughly on a proper orientation spacing, but not on proper leveling. A missalignment to horizontal leveling will result in a skewed horizon display. There is a video that illustrated the easy procedure.
Once the accelerometer biasses calibration succeded you might leaf the factory setup and the variometer falls back into normal operation.
Leak Test:
Very likely the XCVario also will complain about a missing leak test, because there is no result stored in flash memory as the Pur Edition now does. Your variometer was for sure leak tested, so just start the test and wait 60 seconds. Not putting any pressure on the tubes will not test, but passe the test, so that you can leaf the factory setup.
Check Configuration After Updating
After completing the update, review all settings. In most cases, existing settings are retained, but new firmware versions may introduce additional features with default values that require adjustment. Always consult the corresponding release notes. When updating from older releases crosscheck settings and and see if glider polar selected is still correct and also connections to external gadgets are configured as expected.
Troubleshooting
If transmission errors occur, the new software is discarded automatically and the device restarts with the previously installed firmware. The variometer uses two separate firmware areas; new software is always written to the inactive area to ensure continuous operability. If software update mode is entered but no file is selected, the system will automatically time out after 15 minutes and restart with the existing firmware. This process can also be cancelled manually at any time by pressing the rotary control.
If the WiFi connection cannot be established, verify that your device allows connections to networks without Internet access and confirm any related system prompts. The variometer selects a random WiFi channel each time the update function is started, improving reliability in environments with many occupied channels.
Show Boot Messages
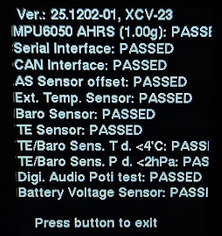
All boot messages are recorded and can be shown even at a later time after booting up the device for diagnose.
Factory Reset

[Cancel]
[ResetAll]
This function allows all device settings to be reset to their factory defaults. All user-defined settings that differ from the default values will be permanently lost. After performing a reset, polars and all other aircraft-specific parameters must be reconfigured. A factory reset can also be executed during a software update via the browser by using the “Factory Reset” button.
Expert Menu:
The Expert Menu is dedicated for troubleshooting and for experts only, using this in field may cause performance issues and also malfunction in case those special parameters are not set wisely. From that reason it is not intended to be used in common and also not recommended, so the password will not be published.


